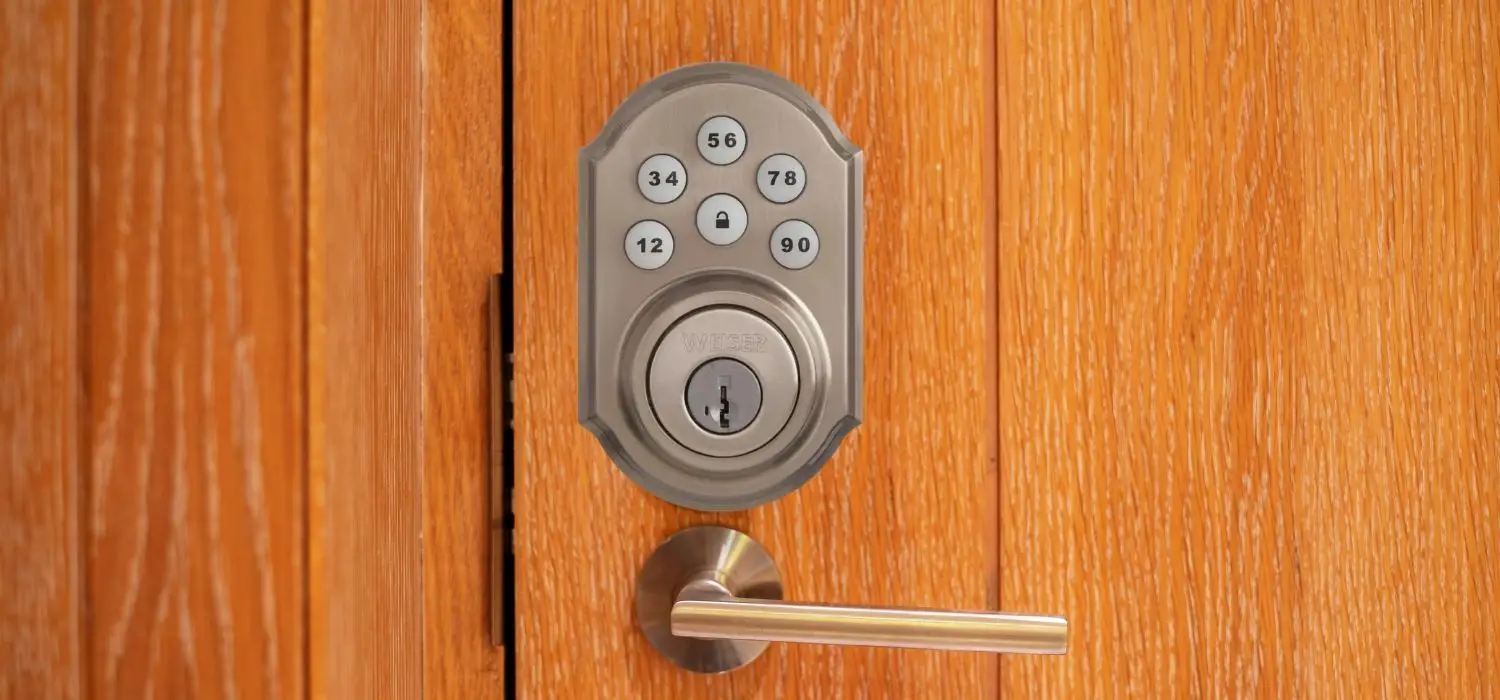
If you have brought a garrison electronic deadbolt, you probably wondering about how do you program a garrison electronic deadbolt or install or control it? It’s true that electronic deadbolts secure your home and are convenient to use. It requires a bit of knowledge to program garrison electronic deadbolts. Here’s how to do it:
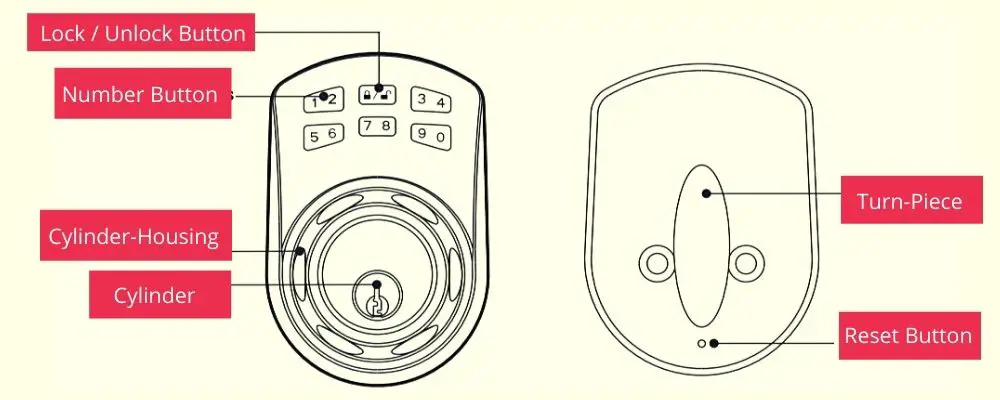
To program the garrison electronic deadbolt, make sure the door is open on both ends. Now, press and hold the set button for two seconds until it makes a beep sound and enters the factory preset master code (0000). Now press button “4” on the keypad and enter a unique programming code (4-10 digit).
However, to better understand how to program a Garrison electronic deadbolt, you must read the manuals that come with the locks.
How to Program a Garrison Round Electronic Deadbolt?
To program the garrison round electronic deadbolt, you have to perform the Door Handing Detection to make the lock works electronically. Now how do you perform Door Handing Detection? Sounds complicated? Well, it’s pretty easy, follow the steps below:
- Enter the default programming code ‘0000’ at first.
- Then press the Garrison button.
- Now press 0.
- End the process by pressing the Garrison button again
You have successfully performed Door Handing Detection if you have followed these instructions. Now, how do you program a round garrison electronic deadbolt? Follow the instructions below to program round garrison electronic deadbolt:
- Enter the default programming code, i.e. (0000), by pressing the Garrison button.
- Press the Garrison button again and press button “4” on the keypad.
- Press the Garrison button once more and enter the new programming code ( 4 to 10 digits).
- Press the Garrison button as the last step to set the new programming code.
Mostly, all types of Garrison electronic deadbolt comes with the same default preset code, and in most case, the setup process is similar.
How to Install Garrison Electronic Deadbolts?
Installing an electronic deadbolt requires a few essential woodworking tools (A drill, template, screwdrivers, and chisels). But if you find the necessities of a few more handy tools, you can use them. Though it requires a little experience, however, you will be able to install a garrison electronic deadbolt by yourself by following the instructions below:
Step 1: Determining Backset
First, grab your tape measure and go to the edge of the door and pull across to see where it lines up at the center of the lock. Take measurement accordingly .
Step 2: Change Latch Face
Now, you have to determine which latch mounting method you will use. Make necessary adjustments for that. If you have a square latch faceplate, no tension, you won’t have to make any adjustment. Using a flat screwdriver to separate the faceplate will be wise.
And the latch face you have selected, snap onto the backplate. Now the drive-in installation part comes. Removing the original latch faceplate and aligning the drive-in sleeve will do the work.
Now, rotate the latch to the backset to adjust until it stops. Also, try reversing to determine proper adjustment.
Step 3: Use a Template to Identify the Door
You may adjust the door’s face height and backset to your liking. The template will help you in marking the center of the door edge and also the center of the circle on the door face.
Step 4: Drill Holes and Latch Inserting
For the lockset, drill Ø2 1/8″ (54 mm) through the door face and drill Ø1″ (25.4 mm) for the latch. And consider following the marks while drilling. Insert the latch. Ensure the latch is parallel to the door face when you insert it. Mark the outline of the faceplate before taking it out.
Step 5: Chisel Space for Latch Faceplate
Chisel necessary depth (5/32″, 4 mm) along the outline to align the faceplate with the door edge. And keep in mind that the drive-in latch doesn’t require chiseling the door edge for the faceplate installation.
Step 6: Install Latch
While inserting the latch into the door, make sure that the cross in the latch remains on the bottom. You can use two wood screws to secure the latch. It won’t be wise to tighten the screws until the lock is fully installed. Now you can install the latch. To execute that, simply drive the latch into the hole on the edge of the door.
Step 7: Mark the Outline of Strike and Drill
Close the door so the latch bolt is against the door frame to identify the strike center. You shall also mark the centerline on the doorframe. That is opposite the latch hole in the door edge. Don’t forget to measure door thickness in one-half from the doorstop. After that, vertically mark the centerline of the strike. Now you have to drill a 1″ (25.4 mm) hole and 1″ (25.4 mm) deep at the intersection of both the vertical and the horizontal line of strike.
Chisel the space. Chisel 5/64″ (2 mm) deep along with the striking outline when you chisel space for the strike. As a result, it will allow the strike to be aligned with the doorframe.
Step 8: Install Strike and Keypad Assembly
Assemble Strike and Keypad Assembly in this step. Tighten the striking plate with wood screws once it has been fitted in the door frame. Keep an eye on the latch bolt’s return. The tailpiece of the cylinder should now be put horizontally into the latch hub of the deadbolt keypad mechanism.
Step 9: IC-wire Insertion and Mounting Plate installing
Take the IC wire in hand and pass it under the latch to the interior side of the door. Insert the tailpiece into the latch by turning the cross-shaped crank. Pass the IC wire through the mounting plate wire hole, and then secure it with screws.
Step 10: Identify Door Handing and Adjusting Thumb Turn Piece
Face the door from the outside to determine its handing. The door is left-handed if the hinge are on the left side. Whereas if the door’s hinges are on the right side, it’s right-handed. See for yourself. For right-handed doors, the finger turn piece must be rotated 45 degrees to the left. The finger turn piece may be rotated 45 degrees to the right for center doors.
Step 11: Install Receiver Module
Disconnect the battery cover from the device. First, push it up, and afterwards pull it out of the way. Using the IC wire, link up the receiver module to the computer.
Step 12: Insert Batteries
It will require 4 (AA) 1.5 V batteries. Insert them and slide the battery cover back onto the receiver module. We recommend alkaline batteries because they help stabilize the power supply. Even if the batteries are completely dead, all settings will remain memory.
How to Reset a Garrison Deadbolt?
Resetting a garrison deadbolt is relatively easy. Whatever the reasons you want to reset the lock, it will take less than a minute for you to do that. Follow the below steps to reset a Garrison deadbolt :
- Indicate the hole on the interior assembly of the lock below the turn-piece, where you will find the reset button.
- Insert a pin into the hole for five seconds.
- Once you hear three long beeps, take the pinout.
When you hear three long beeps, you will know that the reset is complete. Now you are all good to reprogram your lock.
Did I Answer Everything You Want to About How Do You Program a Garrison Electronic Deadbolt?
Unlike traditional deadbolts, electronic deadbolts use programming to make them work. Programing a Garrison electric deadbolt would take a maximum of two to three minutes ( follow the instruction we provide in this article or manuals that come with the locks).
Before you program the electronic deadbolt, make sure to install the lock on the door.